Hardware Integration Update
- projectsilversteps
- Oct 31, 2015
- 2 min read

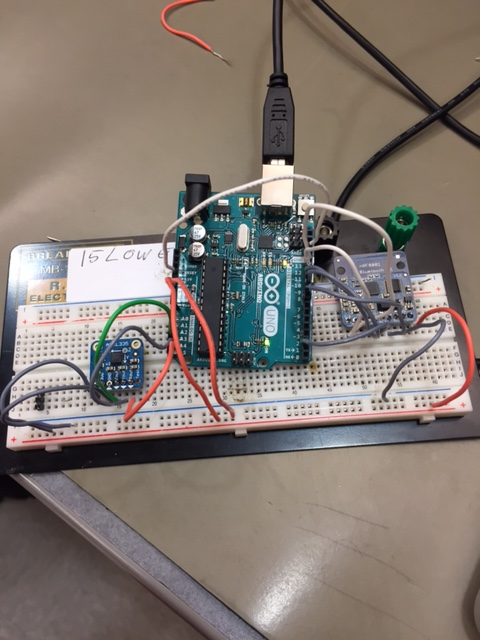
Today, Roy and Karly have accomplished the task of integrating the accelerometer with the LE blutooth and the Arduino Uno. The prototype circuit is shown in the image below.

The code that was used to collect and record the data from the accelerometer was integrated into the bluetooth echo code that we used in the previous meeting. The bluetooth code was then modified to transmit the accelerometer data from the arduino to the application on our phones. In this way, we were no longer sending a message from the application on our phones to the device via bluetooth and the device echoing the message back. Instead, there is now unidirectional communication of accelerometer data from the device to our phones. The code and data transmission successfully functioned. The arduino code we used to transmit the accelerometer data is shown below:
/**************************************************************************/
#include <SPI.h>
#include "Adafruit_BLE_UART.h"
#define ADAFRUITBLE_REQ 10
#define ADAFRUITBLE_RDY 2
#define ADAFRUITBLE_RST 9
Adafruit_BLE_UART uart = Adafruit_BLE_UART(ADAFRUITBLE_REQ, ADAFRUITBLE_RDY, ADAFRUITBLE_RST);
/**************************************************************************/
/*!
This function is called whenever select ACI events happen
*/
/**************************************************************************/
void aciCallback(aci_evt_opcode_t event)
{
switch(event)
{
case ACI_EVT_DEVICE_STARTED:
Serial.println(F("nRF8001 advertising initialized."));
break;
case ACI_EVT_CONNECTED:
Serial.println(F("nRF8001 module paired."));
break;
case ACI_EVT_DISCONNECTED:
Serial.println(F("nRF8001 disconnected or advertising timed out."));
break;
default:
break;
}
}
/**************************************************************************/
/*!
Initialize serial communications at 9600bps and
configure the Arduino to start advertising with the radio
*/
/**************************************************************************/
//connect 3.3v to AREF
const int ap1 = A5;
const int ap2 = A4;
const int ap3 = A3;
int sv1 = 0;
int sv2 = 0;
int sv3 = 0;
double accX = 0;
double accY = 0;
double accZ = 0;
void setup() {
Serial.begin(9600);
while(!Serial); // Leonardo/Micro should wait for serial init
Serial.println(F("Welcome to Project SilverSteps"));
Serial.println(F("SilverSteps Mark II loading"));
// uart.setRXcallback(rxCallback);
uart.setACIcallback(aciCallback);
// uart.setDeviceName("NEWNAME"); /* 7 characters max! */
uart.begin();
}
/**************************************************************************/
/*!
Constantly checks for new events on the nRF8001 and maps ADXL335
*/
/**************************************************************************/
void loop() {
analogReference(EXTERNAL); //connect 3.3v to AREF
// read the analog in value:
sv1 = analogRead(ap1);
// calculate acceleration
accX = sv1 / 1023.0 * 6.0 - 3.;
delay(2);
sv2 = analogRead(ap2);
accY = sv2 / 1023.0 * 6.0 - 3.;
delay(2);
sv3 = analogRead(ap3);
accZ = sv3 / 1023.0 * 6.0 - 3.;
uart.pollACI();
String Xsensor = "x = " + String(accX) + " m/(s^2).";
String Ysensor = "y = " + String(accY) + " m/(s^2).";
String Zsensor = "z = " + String(accZ) + " m/(s^2).";
// print the results to the serial monitor:
uart.print(Xsensor);
uart.print(Ysensor);
uart.print(Zsensor);
delay(8);
}
The next steps for the hardware is to write a manifest that will allow us to connect our bluetooth device to SAMI. Additionally, we will need to integrate a clock component into our circuit so that we can timestamp the data. While Roy is working on the manifest, Karly is designing the housing container for the components and how they will be soldered to fit into the case. She is designing the 3D printed container in CAD as well as ordering aditional components so that the hardware can be powered via battery.


Comments